Tuesday, June 4, 2013

Girl Scout Cupcakes

When I was a child, I was a Girl Scout and we held an annual Father/Daughter Banquet. I still have a picture of my father, my sister, and I at this event. I wish I could include it in this post, but at this current time I can't find it.(If you could see my house right now, you would understand)
When I started leading my daughter's troop three years ago, I knew this was something we had to do. So, last month I was the chairmen of an area Girl Scout He & Me dance. He & Me is the new correct way to say Father/Daughter, since sadly many girls don't have a father around, and we don't want to leave anyone out. We hired a D.J. to come and play music for us and decorated our local community center. Towards the end of the night we drew a name from a hat and crowned one little Girl Scout the Princess of the ball. They all had a wonderful evening with their dads (uncles, grandpas, etc.)

I decided to make cupcakes for the dance, and of course I like to be a little fancy with my food. I had watched an episode of D.C. Cupcakes were they used a grid to decorate the cupcakes like a picture of the entire world. Each square of the grid equals one cupcake and together all the cupcakes form a picture.
I printed out the Girl Scout logo from my computer and drew a graph across it so that I had 120 squares since I wanted to make 120 cupcakes for the night.
I made the cupcakes at home and iced them all in white (well mostly all of them, I left a few plain because I knew they would need to be all green anyway).
I took the cupcakes to the dance early that day while I was decorating. I went ahead and placed them on the table where they would stay and decorated them there. (I had no way of transporting them in the correct order since there were so many)
I just looked at my grid and piped the green icing on each cupcake according to it's square on the picture. It was pretty easy!
The final product before it was enjoyed my 44 girls and their guests!


Let them Eat Cake!

 Once upon a time, long ago before I gave birth to my own children, I loved to make fancy cakes, pies, cookies, cupcakes, and pretty much anything sweet. I made some really adorable birthday cakes for my little sister and many of my nieces and nephews.  Now that I have my own children, carving out the time for such things doesn't always happen. It seems like when you are trying to plan the entire party and clean your whole house, making a fancy cake takes a back seat.
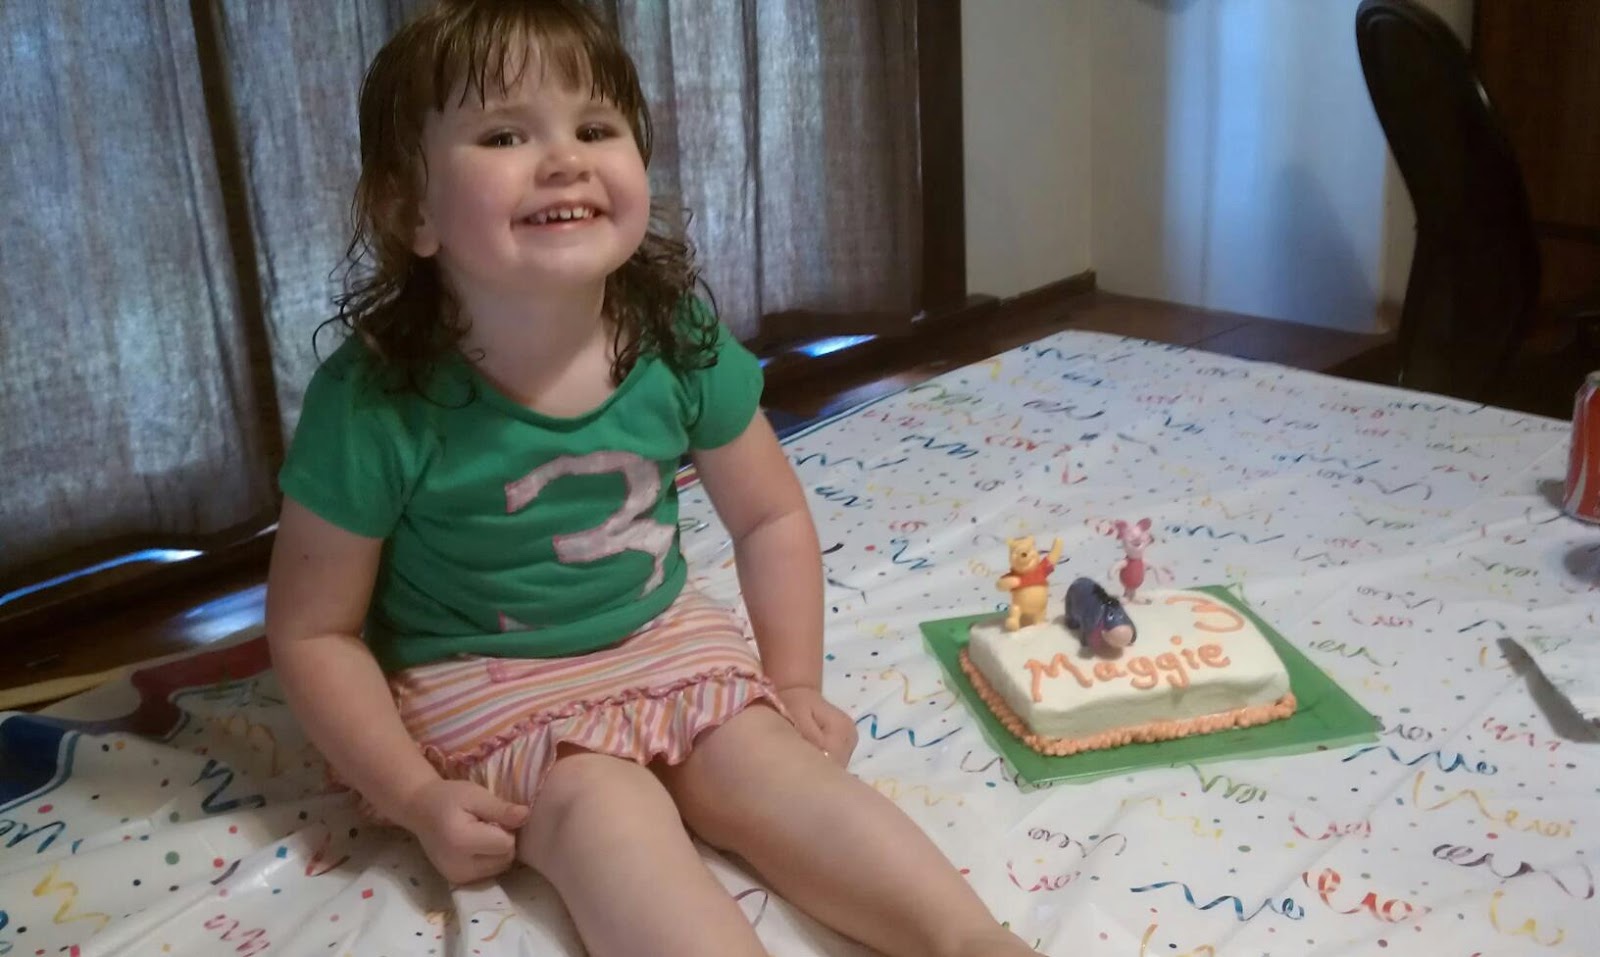
Poor Maggie Just got a cake with toys stuck in it! She was happy, so that's all that really matters!

 The last couple of years on my daughter Zayda's birthdays I have used a butter cream transfer technique. I have found this technique to be very fast and easy. It hasn't produced the most perfect images for me, but my kids don't seem to care about perfection, so it worked for us.
Last year was Rapunzel from the movie Tangled

This year was a ballerina

I took a coloring page that I had printed from a free online web site (   http://www.coloring.ws/coloring.html is a good place).
I laid the page on a flat cookie sheet and then covered it with clear cling wrap (seran wrap).
I piped the image onto the cling wrap, starting with the black outlines first and then filling in the other colors. I placed the whole cookie sheet in the freezer for at least a few hours.
I went ahead and made a regular cake and iced it flat. After the image was good and frozen, I took it out of the freezer and flipped in onto the cake and peeled off the cling wrap.
This would probably work a lot better with a simple image and not a human face, but leave it to my children to ask for something difficult.
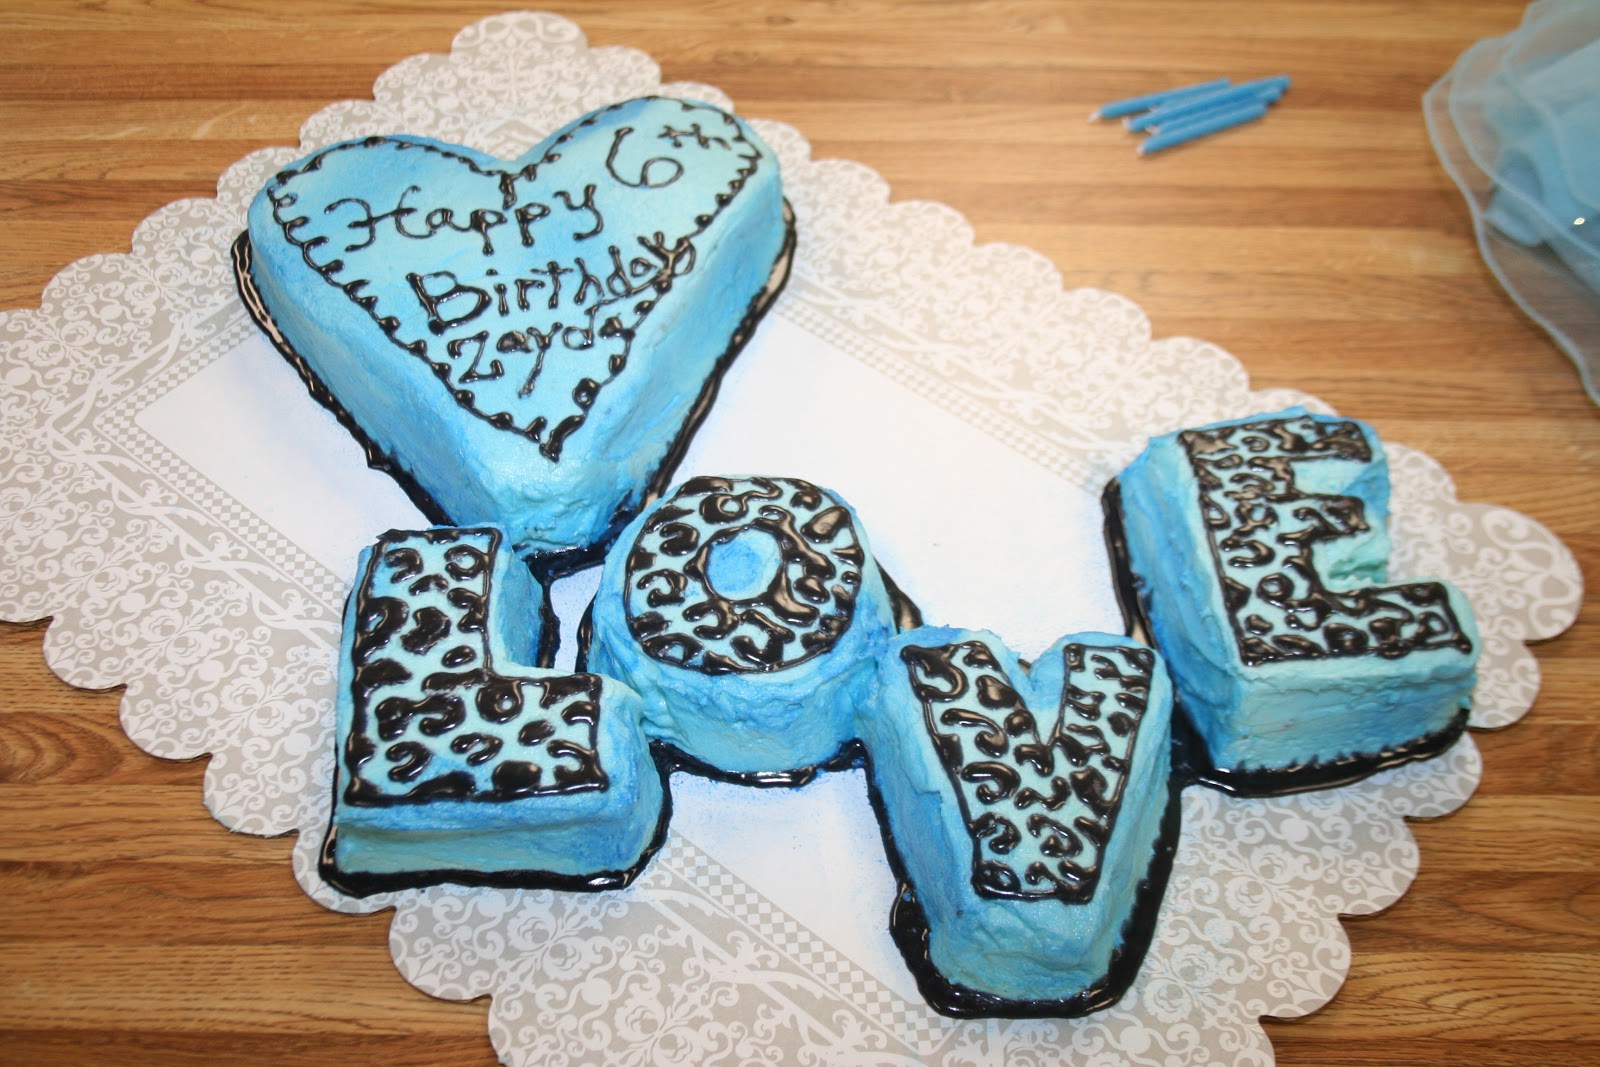
A few years ago, Zayda had what I thought was a pretty strange request, but it turned out cute
I just started with a couple regular 13x9 cakes, cut them into letters, and iced them with buttercream icing.
It wasn't fabulous, but it was a big hit with my little diva!!
I like to make a cake just for the birthday girl (or boy) and cupcakes for everyone else. Having a cake all to themselves makes the day even more special.
Just a note: wilton spray icing color is great if you are going for nice looks, but in my daughter's opinion ( and the opinion of most of my Girl Scout Troop), it tastes terrible (very chemical taste). So if you chose to use it, don't use to much if someone is going to be judging the taste of your creation!

Friday, May 31, 2013

shout out :)

I grew up two steps behind my sister. She is awesome. She is a South paw, so her brain  has the capacity for a lot more literal nonsense than most of us can fathom. Luckily my parents were aware of this and didn't expect me to be on her academic level. Unfortunately, I can not say the same for all of our teachers in school. After having my, towing the line of geniusness sister, I guess they expected me to measure up to her smarts. But I don't, and that is o.k. with me. I stopped measuring a long time ago (in more ways than one, I don't even want to know what my waist size is). So if you are looking for a blog that blows you away with its literary ability and what not.....
Not a bad picture, considering it was taken by a six year old!


http://www.stop-drop-roll-rachel.blogspot.com/

I love her and she is awesomely crafty too!
I can't even measure up to her hair length! :)

Thursday, May 30, 2013

No more burnt pots in the back yard!!

If you know me personally, Then you probably already know that I am forgetful.  O.k. in all honesty....I am a complete SPAZ.

I love sweet tea. My mother always makes fresh tea every day, so that is what I grew up drinking. I like to brew mine in a pot over the stove, however, I am REALLY bad about forgetting that I put a pot of water on to boil. Eventually I smell the horrible stink of smoking burning metal pan, but at that point, I don't want to leave the stink in my kitchen, so I toss it into the grass in the backyard. I do eventually go retrieve the scorched pan and throw it away (O.K. fine...my husband does this for me).
I used to use metal tea kettles, but after I burned three in less than 6 months, my husband wouldn't allow me to buy any more.
So, anyway, here is my new solution to my spazzyness (yes, that is a new word that I just made up).
I now use my Keuhrig to heat the water.
I just ran the water through, without a k-cup, into a glass with tea bags in it. Let it sit for awhile and mixed it into sugar and water in the tea pitcher!
My mother used to use her coffee pot to make tea in, however, once in awhile she would make coffee in it for a guest and then our tea tasted like a coffee for several days. This does not happen with my Keuhrig! Yeah! Finally no more burnt pots littering my back yard, my coffee tastes like coffee, and my tea tastes like tea ;)

Friday, May 24, 2013

The shirt off his back

My husband loves to shop more than any straight man that I have ever met in my life. This is not a bad thing! We love to go on shopping trips together and if we had more money we would do it a lot more often. As I mentioned before in the famous UNDERWEAR post, He has clothing issues. He can't stand to wear socks, underwear, or t-shirts very many times without buying new. I on the other hand am a bit of a slob. I am currently wearing his sock cast offs, jeans with a hole in the thigh, and a t-shirt sporting the Bible school theme from three summers ago(In my defense, I am just at home with my girls, and they don't judge me based on my clothes).
So, anyway, my mans clothing quirks seem to work out great for my crafts. He is a nurse at our local Emergency Room hospital, so he wears scrubs all the time. He insists on wearing white t-shirts under his scrubs so his manly chest hair doesn't hang out, which is a good thing because nobody wants a nurse who looks like he just came from the 1985 cast of Magnum P.I. Like most of his clothes, he won't wear them very many times before he says they aren't as white as the day he bought them, and therefore clearly unwearable.
I happened to have an idea for a star shaped rag rug, so I cut up some of his white shirts, found some red and blue scrap material from my mother's giant hoard and here is the result:


I started out using a pattern for a star shaped afghanhttp://www.angelfire.com/va3/heartfeltangels/littlestarafghan.html, but that didn't seem to want to lay flat nicely as a rug. I changed it up a bit after a few rounds.

If I would have been thinking clearly (which almost never happens), then I would have written out my own pattern. I am going to try and work one out soon.

Wednesday, May 22, 2013

Forget Easter Eggs, this year we dyed Easter dresses!

I'm a little behind, but better late than never, right?
Like a lot of church going people, Our family has always had the tradition of new dresses on Easter Sunday.  This year my little girls (they just turned 4 years and 8 years, bless these non-teenage years!) wanted their favorite colors of dresses. Although orange seems to be a trending color right now, I couldn't find anything that cute in my price range. I will admit, my price range is pretty low since I am a stay-at-home-Mom and I'm just really cheap anyway! I found a couple of cream colored dresses at Target (I love that place!) that were on sale for $12.99 a piece.


Cream.....very pretty, but very boring. We really are NOT boring people. When I say WE, I really mean myself and my girls, because my husband would be more than happy to go with the boring crowd any day. I love him with all my heart, but he is a white wall, white ceiling kind of guy, so sometimes he freaks out a little about my choices.
I went to walmart and purchased bottles of Rit dye (purple & orange, I can't remember their offical color names). They weren't expensive, about $3.00 a piece.
I followed the "dye in your washing machine" directions. I just left the lid open on my washing machine for quite awhile so it could soak without spinning around ( I have an older washing machine, so I don't know how that would work out with some of the new machines.)
FYI: some types of fabrics dye better if you add salt to the dye bath, so be sure you read the directions on the bottle and be prepared to add about 1/2 to a full cup of salt.
The dresses turned out perfect. the only part that didn't dye was the thread, but they still looked great!

Tuesday, February 5, 2013

Crocheted Volleyball pattern

I made a crocheted volleyball last year for a Volleyball game that our local Middle School was hosting. The game was a fundraiser for cancer (relay for Life, I think, maybe).
All the girls loved it. Unfortunately, like a lot of my projects, I didn't write down how I made it. Mostly I like to just sit down and make something, no pattern, no preparation, Just Do It.
I was doing a lot of experimenting with Tunisian crochet at the time. I remember loving the look, but hating the work it took to get done. So this year, I decided to make a new one and make a pattern. It turned out just a fuzz bigger than an actual volleyball size, but I still love it.

I used a size J hook. I didn't pay to much attention to gauge. If you are wanting to get the exact size of an official volleyball, then you might want to use a size or two smaller hook. 
I used white, navy, and grey yarn. This happens to be the colors of my step-daughter's school (I homeschool my little girls but if I didn't, this would be their school colors too). The middle school volleyball coach happens to be a good friend of mine (and an all-around awesome lady), so this ball is for the South Central Lady Falcons!


Crochet Volleyball pattern


Crochet hook size J
With white, chain 27
Double crochet in 3rd chain from hook, and continue to double crochet in each stitch across.
Row 2:  Chain 2, turn, double crochet in each stitch across
Row 3:  Chain 2, turn, double crochet in each stitch across
Break  yarn and finish off.
Turn strip upside down and slip stitch in bottom beginning chain. Single crochet in each stitch across and break yarn and finish off.

With Gray, slip stitch to join (on either end of the white strip)
Chain 2, double crochet in each stitch across.
Row 2: chain 2, turn, double crochet 2 together, double crochet across the row until you have 2 spaces left, double crochet2 together.
Break  off yarn (be sure to leave a long tail of yarn to stitch with)


Row 3: repeat row 2
With Navy, repeat what you did with the Gray, only on the other side of the white strip.
Make 6 of these sections and then sew them together with a yarn needle.

 Make sure you sew them facing opposite directions like a real volleyball.
I stuffed the ball with some fiberfill before I sewed up the last section. I was afraid that the fiberfill might poke through between the crochets, so I put some quilt batting around the inside (so of lining the ball). It ended up being a nice soft squishy ball. If you want a harder more bouncyish ball, you might try sewing your sections over a cheap kids rubber ball. the only downside to that would be that if your ball looses air or pops, then you are going to have to take the whole thing apart to replace it.

Well, I am off to make another one of these in the opposing teams colors!