I designed this rug as a present for my baby sister. She is no longer a baby, she will be 19 next month (gasp). She is turning into an awesome lady. This fall she starts her second year in college and will be living in a sorority house. Last year she became a proud member of the Sigma Sigma Sigma, or Tri-Sigs as they are called.
So here it is:
I originally thought I would make it all hot pink with purple letters, but I quickly realized that I didn't have enough hot pink material and didn't want to go buy more, so I went with hot pink, light pink, and white.
The entire rug is made up of double crochets. I drew a graph of the sigmas before I started.
It looked like this:
I started at the left side of the graph and worked my way across. The rug was 36 double crochets across, I started by chaining 38 and double crocheting in 4th chain from the hook. (chain 3 counts as a double crochet. Double crochet across and chain 3 and turn for each row.
For the first Sigma, I carried some of the colors across, but I realized that didn't look quite as neat as it should. Carrying colors with yarn works out pretty well, but carrying colors with material does not. So for the next two Sigmas, I changed colors each time. I didn't link all my material into a roll before I started like I usually do, I just worked from a bag of strips, that way I could cut off and link in a new color whenever I needed one, which I realize is a lot of work when you get to the middle and you have to switch after one single stitch, but it looks so much smoother.
After finishing all 32 rows, my finished rug measured 19 inches across and 27 inches long (not including fringe).
I tied some purple fringe on the ends of mine (per my sister's request), and that really made it adorable.
So since this project worked out so well, I am now wondering what other designs I could crochet into a rug. The possibilities are endless!
Free crochet patterns, free knit patterns, free craft ideas, free crochet rag rug patterns, and quirky stories about life
Saturday, July 20, 2013
Wednesday, July 3, 2013
Watermelon Rag Rug
Watermelon Rag Rug
Sorry for the terrible picture. My husband got a new camera to take on a mission trip to guatemala, so I thought I would use it. I now know that my phone takes better pictures than that crappy little thing.While my husband was in Guatemala, setting up and working in a free medical clinic for a week, I took our little girls and went to visit my sister in southern Indiana. My sister and her husband have 9 beautiful, healthy, happy children (and one on the way). That is pretty unheard of these days, but it works for them, and we love spending time there.
I have been working on a lot of rag rugs lately, mainly because my mother keeps giving me bags of fabric that she has already cut into strips for me. She made A TON of little pillow case dresses to send with the group going to Guatemala, and so all of the scraps of fabric she had left over she would send my way.
While in Indiana, I found inspiration everywhere. I came home with so many ideas. The following pattern is the first one I finished.
NOTE: when working with rag strips, sometimes you will need to add or decrease a stitch or two here and there to get your rug to lay flat properly. It all depends on how wide you cut your fabric and what type of fabric you are using. also it may depend on how tight or loose you crochet.
Watermelon Rag Rug
Hook size N/10mmdc = double crochet
rnd = round
ch = chain
st = stitch
I wrote this pattern in rounds, but since it is only a half circle rug, you will be turning, each (round) as I have referred to them is actually just a half round or row.
with bright pink fabric
chain 4, join with a slip stitch to form a ring
round 1: chain 3, 7 double crochets in the ring
rnd 2: chain 3, turn, (working in front loops only) 2 double crochets in each space (your chain 3 will count as your first double crochet)
rnd 3: chain 3, turn, (working in back loops only) , dc in first st, 2 dc in the next st, 1 dc in next st,
with black fabric 2 dc in next st
with pink 1 dc in st, 2 dc in st, 1 dc in st
with black fabric 2 dc in next st
with pink 1 dc in st, 2 dc in st, 1 dc in st
with black 2 dc in next st
with pink, 1 dc in st, 2 dc in st, 1 dc in st, 1 dc in st
rnd 4: with pink, ch 3, turn, (working in front loops only) *dc in each of first 3 stitches, 2 dc in next st*, repeat from * around
rnd 5: with pink, ch 3, turn (working in back loops only) 1 dc in each of next 3 st
with black 2 dc in next st
with pink 1 dc in each of next 4 st, 2 dc in next st,
with black 1 dc in each of next 2 st
with pink 1 dc in each of next 2 st, 2 dc in next st
with black 1 dc in each of next 2 st
with pink 1 dc in each of next 2 st, 2 dc in next st, 1 dc in each of next 2 st
with black 1 dc in each of next 2 st
with pink 2 dc in each of last 2 spaces
rnd 6: with pink, chain 3, turn (working in front loops only) dc in each st around
rnd 7: with pink, chain 3, turn (working in back loops only) 1 dc in each of next 6 st, 2 dc in next st, 1 dc in next st
with black 1 dc in each of next 2 st
with pink 1 dc in each of next 2 st, 2 dc in next st, 1 dc in each of next 2 st,
with black 1 dc in each of next 2 st
with pink 1 dc in next st, 2 dc in next st, 1 dc in each of next 4 st,
with black 1dc in each of next 2 st
with pink 1dc in same st as last black dc, 1 dc in each of next 5 st, 2 dc in next st, 1 dc in each of last 2 st
rnd 8: with pink chain 3, turn (working in front loops only)
dc in first 7 st, 2 dc in next st, *dc in each of next 6 st, 2 dc in next st* repeat from the * around
rnd 9: with pink chain 3, turn (working in back loops only)
*1 dc in each of 7 st, 2 dc in next st* repeat from * around
rnd 10:with pink chain 3, turn, (working in front loops only)
*1 dc in each of 8 st, 2 dc in next st* repeat from * around
rnd 11: with a lighter shade of pink, ch 3, turn, (working in back loops only)
*1 dc in each of 5 st, 2 dc in next st* repeat from * around
rnd 12: with ligher pink, ch 3, turn (working in front loops only)
* 1dc in each of 6 st, 2 dc in next st * repeat from the * around
rnd 13: with a light green, chain 3, turn (working in back loops only)
*1 dc in each of 7 st, 2 dc in next st* repeat from the * around
rnd 14: with a darker green, ch 3, turn (working in front loops only)
*1 dc in each of 8 st, 2 dc in next st* repeat from the * around
rnd 15: with dark green, ch 3, turn, (working in back loops only)
*1 dc in each of 9 st, 2 dc in next st* repeat from the * around
weave in any loose fabric strips and you are finished!
Thursday, June 20, 2013
My plans!
When we first moved into our house 4 1/2 years ago, Our youngest daughter was about 4 or 5 weeks old. We decided that we would store anything that wasn't necessary to daily life in a bedroom upstairs that we weren't using, until I was able to organized and arrange stuff. We knew that we would remodel the room for our daughter, someday.
Last summer we decided that someday was now. We are still not finished. Probably if we were a normal family who just wanted the old paneling (this room was once a gun display room) and plaster removed and new drywall up, we would be finished by now, but that isn't my style.
We decided that our two younger girls would be sharing the bedroom, so in order to make more space, I decided to have the beds framed into the walls.
I drew up plans and everything. I have been drawing plans for houses since I was a child, mostly they included rooms for my pool and in-house McDonalds. I would proceed to give these plans to my father and tell him that when I was old enough he had to build them for me. So that fact that the plans for this room are actually being carried out is quite a MAJOR accomplishment for me.
The room is still a far cry from being finished. We have only been working on it in our spare time, which is almost never, but I am already so excited to share it with you.
You are probably thinking wow, what a mess, but just wait till you see the finished product. I hope it comes sooner than later!!!!
Last summer we decided that someday was now. We are still not finished. Probably if we were a normal family who just wanted the old paneling (this room was once a gun display room) and plaster removed and new drywall up, we would be finished by now, but that isn't my style.
We decided that our two younger girls would be sharing the bedroom, so in order to make more space, I decided to have the beds framed into the walls.
I drew up plans and everything. I have been drawing plans for houses since I was a child, mostly they included rooms for my pool and in-house McDonalds. I would proceed to give these plans to my father and tell him that when I was old enough he had to build them for me. So that fact that the plans for this room are actually being carried out is quite a MAJOR accomplishment for me.
The room is still a far cry from being finished. We have only been working on it in our spare time, which is almost never, but I am already so excited to share it with you.
Wednesday, June 19, 2013
D's Sunflower Rag Rug
Twice a month a group of awesome ladies gather at my local Library to crochet, knit, exchange patterns, and most importantly....share stories. I consider this time to be my free therapy. I love these ladies! We are from all different ages and walks of life, but we all love to create things with yarn.
Last time we met, I had no choice but to take my little girls with me. Don't get me wrong here, I love my girls and I love my time with them, but Mommy needs her break time!!!
Usually to begin these very informal meetings, everyone shows off what they have been working on. My friend Delyn had been making Minion hats (based on the movie despicable me.) My girls love that movie, and so Zayda immediately put on a hat and claimed it as her own. Being the generous friend that she is, Delyn insisted that she could have it and wouldn't give me a real answer about how much money she intended to sell them for. So at about 11:30 PM, while I was laying in bed not sleeping because my brain doesn't want to quit for the night, I decided to make something for Delyn in return. I remembered that she loves sunflowers, and since I have been making so many rag rugs lately, Boom....and Idea.....So here it is!
Sunflower Rag Rug Pattern
I used a crochet hook size N 15/10mm
If you haven't worked with rags to crochet before, see my post about preparing them HERE!
with brown rags, chain 4, slip stitch in 1st chain you made to form a ring.
round 1: chain 3, make 11 double crochets into ring, slip stitch in top of chain 3 to join.
round 2: Chain 3, make 2 double crochets in each space around, working in back loop only, slip stitch in top of chain 3 to join
round3: chain 3, * double crochet in first space, 2 double crochets in next space (all only in back loops)*, repeat from the * all the way around, slip stitch in top chain to join.
round 4: chain 3, *double crochet in first space, double crochet in next space, 2 double crochets in next space (all in back loops only)*, repeat from the * around, slip stitch in top chain to join.
round 5: Switch to yellow rags
chain 3, * one double crochet in each of first three spaces, two double crochets in next space (all in back loop only)* , repeat from * around, slip stitch in top chain to join.
round 6: chain 6, single crochet in first space, * chain 6, skip a space, single crochet in next space*, repeat from * around, join with a slip stitch to 1st chain.
round 7: slip stitch your way to the top of the 1st chain 6 space, *chain 2, single crochet in the next chain 6 spot* , repeat from the * around, join with slip stitch.
round 8: chain 3, *2 double crochets in chain 2 space, 2 double crochets in single crochet space, 2 double crochets in chain 2 space, 1 double crochet in single crochet space* repeat from the * around, slip stitch to join
round 9: chain 6, single crochet in 1st space, *chain 6, skip a space and single crochet in next space*, repeat from the * around, slip stitch to join.
round 10: slip stitch your way to the top of the chain 6 space, * chain 2, single crochet in the next chain 6 space*, repeat from the * around, slip stitch to join.
round 11: *chain 4, single crochet in the single crochet space*, repeat from the * around, slip stitch to join.
weave in loose ends and you're done!
My finished rug measured about 22 inches across, if you want a bigger rug, just add more rounds.
Last time we met, I had no choice but to take my little girls with me. Don't get me wrong here, I love my girls and I love my time with them, but Mommy needs her break time!!!
Usually to begin these very informal meetings, everyone shows off what they have been working on. My friend Delyn had been making Minion hats (based on the movie despicable me.) My girls love that movie, and so Zayda immediately put on a hat and claimed it as her own. Being the generous friend that she is, Delyn insisted that she could have it and wouldn't give me a real answer about how much money she intended to sell them for. So at about 11:30 PM, while I was laying in bed not sleeping because my brain doesn't want to quit for the night, I decided to make something for Delyn in return. I remembered that she loves sunflowers, and since I have been making so many rag rugs lately, Boom....and Idea.....So here it is!
Sunflower Rag Rug Pattern
I used a crochet hook size N 15/10mm
If you haven't worked with rags to crochet before, see my post about preparing them HERE!
round 1: chain 3, make 11 double crochets into ring, slip stitch in top of chain 3 to join.
round 2: Chain 3, make 2 double crochets in each space around, working in back loop only, slip stitch in top of chain 3 to join
round3: chain 3, * double crochet in first space, 2 double crochets in next space (all only in back loops)*, repeat from the * all the way around, slip stitch in top chain to join.
round 4: chain 3, *double crochet in first space, double crochet in next space, 2 double crochets in next space (all in back loops only)*, repeat from the * around, slip stitch in top chain to join.
round 5: Switch to yellow rags
chain 3, * one double crochet in each of first three spaces, two double crochets in next space (all in back loop only)* , repeat from * around, slip stitch in top chain to join.
round 6: chain 6, single crochet in first space, * chain 6, skip a space, single crochet in next space*, repeat from * around, join with a slip stitch to 1st chain.
round 7: slip stitch your way to the top of the 1st chain 6 space, *chain 2, single crochet in the next chain 6 spot* , repeat from the * around, join with slip stitch.
round 8: chain 3, *2 double crochets in chain 2 space, 2 double crochets in single crochet space, 2 double crochets in chain 2 space, 1 double crochet in single crochet space* repeat from the * around, slip stitch to join
round 9: chain 6, single crochet in 1st space, *chain 6, skip a space and single crochet in next space*, repeat from the * around, slip stitch to join.
round 10: slip stitch your way to the top of the chain 6 space, * chain 2, single crochet in the next chain 6 space*, repeat from the * around, slip stitch to join.
round 11: *chain 4, single crochet in the single crochet space*, repeat from the * around, slip stitch to join.
weave in loose ends and you're done!
My finished rug measured about 22 inches across, if you want a bigger rug, just add more rounds.
![]() |
| Kitty approved! |
Thursday, June 6, 2013
Am I doing things the WRITE way?
We homeschool.......
Whenever we speak this line to anyone, it always starts a conversation. Some people are strongly against it and some people give us praise and ask questions about how they can go about doing it themselves. We have a million and one reasons why we homeschool our little girls instead of sending them to the public school (which by the way is a great school), but I won't get into that just now.
I am always very critical of myself. Homeschooling can bring this out full force. I don't always have the best grammar and I wasn't ever a straight A student myself. So how do I have the skills to teach my children?
This is a question that I ask myself quite a bit. I still don't have the answer. I hope and pray that God guides me in the right direction, but how do I know?
It is the little things that tell me, for example:
My Eight year old loves the Disney movie Brave and one day she came up with this contraption all on her own.
In case you haven't seen the movie, the main character (Merida) is an amazing archer. My daughter really wants a bow and arrow, but for the time being she is happy to use her home made one.
It is made from a foam sword (which was already starting to break and duct taped back together), the elastic waist band from her father's boxer shorts, and the arrow is a half a pool noodle. Believe it or not, it actually shoots pretty well.
Yesterday, my little sister came to visit and my eight year old shared a book with her that she had been writing. I was unaware of this book. She likes to be very secretive about things she is writing or drawing until they are completely finished, but she frequently shares her secrets with her aunt because they are very close at heart! My sister came to me and said," have you read this book? It is really impressive, several chapters done already, a title and everything!" I was pretty excited, but I kept it to myself. I can't wait until she brings me the finished product.
I will probably always question myself about whether or not I am doing a good job with educating my children. I guess I won't know for sure until they are adults, but until then, I am satisfied by their little sparks of creativity.
Whenever we speak this line to anyone, it always starts a conversation. Some people are strongly against it and some people give us praise and ask questions about how they can go about doing it themselves. We have a million and one reasons why we homeschool our little girls instead of sending them to the public school (which by the way is a great school), but I won't get into that just now.
I am always very critical of myself. Homeschooling can bring this out full force. I don't always have the best grammar and I wasn't ever a straight A student myself. So how do I have the skills to teach my children?
This is a question that I ask myself quite a bit. I still don't have the answer. I hope and pray that God guides me in the right direction, but how do I know?
It is the little things that tell me, for example:
My Eight year old loves the Disney movie Brave and one day she came up with this contraption all on her own.
In case you haven't seen the movie, the main character (Merida) is an amazing archer. My daughter really wants a bow and arrow, but for the time being she is happy to use her home made one.
It is made from a foam sword (which was already starting to break and duct taped back together), the elastic waist band from her father's boxer shorts, and the arrow is a half a pool noodle. Believe it or not, it actually shoots pretty well.
Yesterday, my little sister came to visit and my eight year old shared a book with her that she had been writing. I was unaware of this book. She likes to be very secretive about things she is writing or drawing until they are completely finished, but she frequently shares her secrets with her aunt because they are very close at heart! My sister came to me and said," have you read this book? It is really impressive, several chapters done already, a title and everything!" I was pretty excited, but I kept it to myself. I can't wait until she brings me the finished product.
I will probably always question myself about whether or not I am doing a good job with educating my children. I guess I won't know for sure until they are adults, but until then, I am satisfied by their little sparks of creativity.
Tuesday, June 4, 2013
Girl Scout Cupcakes
When I was a child, I was a Girl Scout and we held an annual Father/Daughter Banquet. I still have a picture of my father, my sister, and I at this event. I wish I could include it in this post, but at this current time I can't find it.(If you could see my house right now, you would understand)
When I started leading my daughter's troop three years ago, I knew this was something we had to do. So, last month I was the chairmen of an area Girl Scout He & Me dance. He & Me is the new correct way to say Father/Daughter, since sadly many girls don't have a father around, and we don't want to leave anyone out. We hired a D.J. to come and play music for us and decorated our local community center. Towards the end of the night we drew a name from a hat and crowned one little Girl Scout the Princess of the ball. They all had a wonderful evening with their dads (uncles, grandpas, etc.)
I decided to make cupcakes for the dance, and of course I like to be a little fancy with my food. I had watched an episode of D.C. Cupcakes were they used a grid to decorate the cupcakes like a picture of the entire world. Each square of the grid equals one cupcake and together all the cupcakes form a picture.
I printed out the Girl Scout logo from my computer and drew a graph across it so that I had 120 squares since I wanted to make 120 cupcakes for the night.
I made the cupcakes at home and iced them all in white (well mostly all of them, I left a few plain because I knew they would need to be all green anyway).
I took the cupcakes to the dance early that day while I was decorating. I went ahead and placed them on the table where they would stay and decorated them there. (I had no way of transporting them in the correct order since there were so many)
I just looked at my grid and piped the green icing on each cupcake according to it's square on the picture. It was pretty easy!
When I started leading my daughter's troop three years ago, I knew this was something we had to do. So, last month I was the chairmen of an area Girl Scout He & Me dance. He & Me is the new correct way to say Father/Daughter, since sadly many girls don't have a father around, and we don't want to leave anyone out. We hired a D.J. to come and play music for us and decorated our local community center. Towards the end of the night we drew a name from a hat and crowned one little Girl Scout the Princess of the ball. They all had a wonderful evening with their dads (uncles, grandpas, etc.)
I decided to make cupcakes for the dance, and of course I like to be a little fancy with my food. I had watched an episode of D.C. Cupcakes were they used a grid to decorate the cupcakes like a picture of the entire world. Each square of the grid equals one cupcake and together all the cupcakes form a picture.
I printed out the Girl Scout logo from my computer and drew a graph across it so that I had 120 squares since I wanted to make 120 cupcakes for the night.
I made the cupcakes at home and iced them all in white (well mostly all of them, I left a few plain because I knew they would need to be all green anyway).
I took the cupcakes to the dance early that day while I was decorating. I went ahead and placed them on the table where they would stay and decorated them there. (I had no way of transporting them in the correct order since there were so many)
I just looked at my grid and piped the green icing on each cupcake according to it's square on the picture. It was pretty easy!
![]() |
| The final product before it was enjoyed my 44 girls and their guests! |
Let them Eat Cake!
Once upon a time, long ago before I gave birth to my own children, I loved to make fancy cakes, pies, cookies, cupcakes, and pretty much anything sweet. I made some really adorable birthday cakes for my little sister and many of my nieces and nephews. Now that I have my own children, carving out the time for such things doesn't always happen. It seems like when you are trying to plan the entire party and clean your whole house, making a fancy cake takes a back seat.
The last couple of years on my daughter Zayda's birthdays I have used a butter cream transfer technique. I have found this technique to be very fast and easy. It hasn't produced the most perfect images for me, but my kids don't seem to care about perfection, so it worked for us.
Last year was Rapunzel from the movie Tangled
This year was a ballerina
I took a coloring page that I had printed from a free online web site ( http://www.coloring.ws/coloring.html is a good place).
I laid the page on a flat cookie sheet and then covered it with clear cling wrap (seran wrap).
I piped the image onto the cling wrap, starting with the black outlines first and then filling in the other colors. I placed the whole cookie sheet in the freezer for at least a few hours.
I went ahead and made a regular cake and iced it flat. After the image was good and frozen, I took it out of the freezer and flipped in onto the cake and peeled off the cling wrap.
This would probably work a lot better with a simple image and not a human face, but leave it to my children to ask for something difficult.
A few years ago, Zayda had what I thought was a pretty strange request, but it turned out cute
I like to make a cake just for the birthday girl (or boy) and cupcakes for everyone else. Having a cake all to themselves makes the day even more special.
Just a note: wilton spray icing color is great if you are going for nice looks, but in my daughter's opinion ( and the opinion of most of my Girl Scout Troop), it tastes terrible (very chemical taste). So if you chose to use it, don't use to much if someone is going to be judging the taste of your creation!
![]() | |
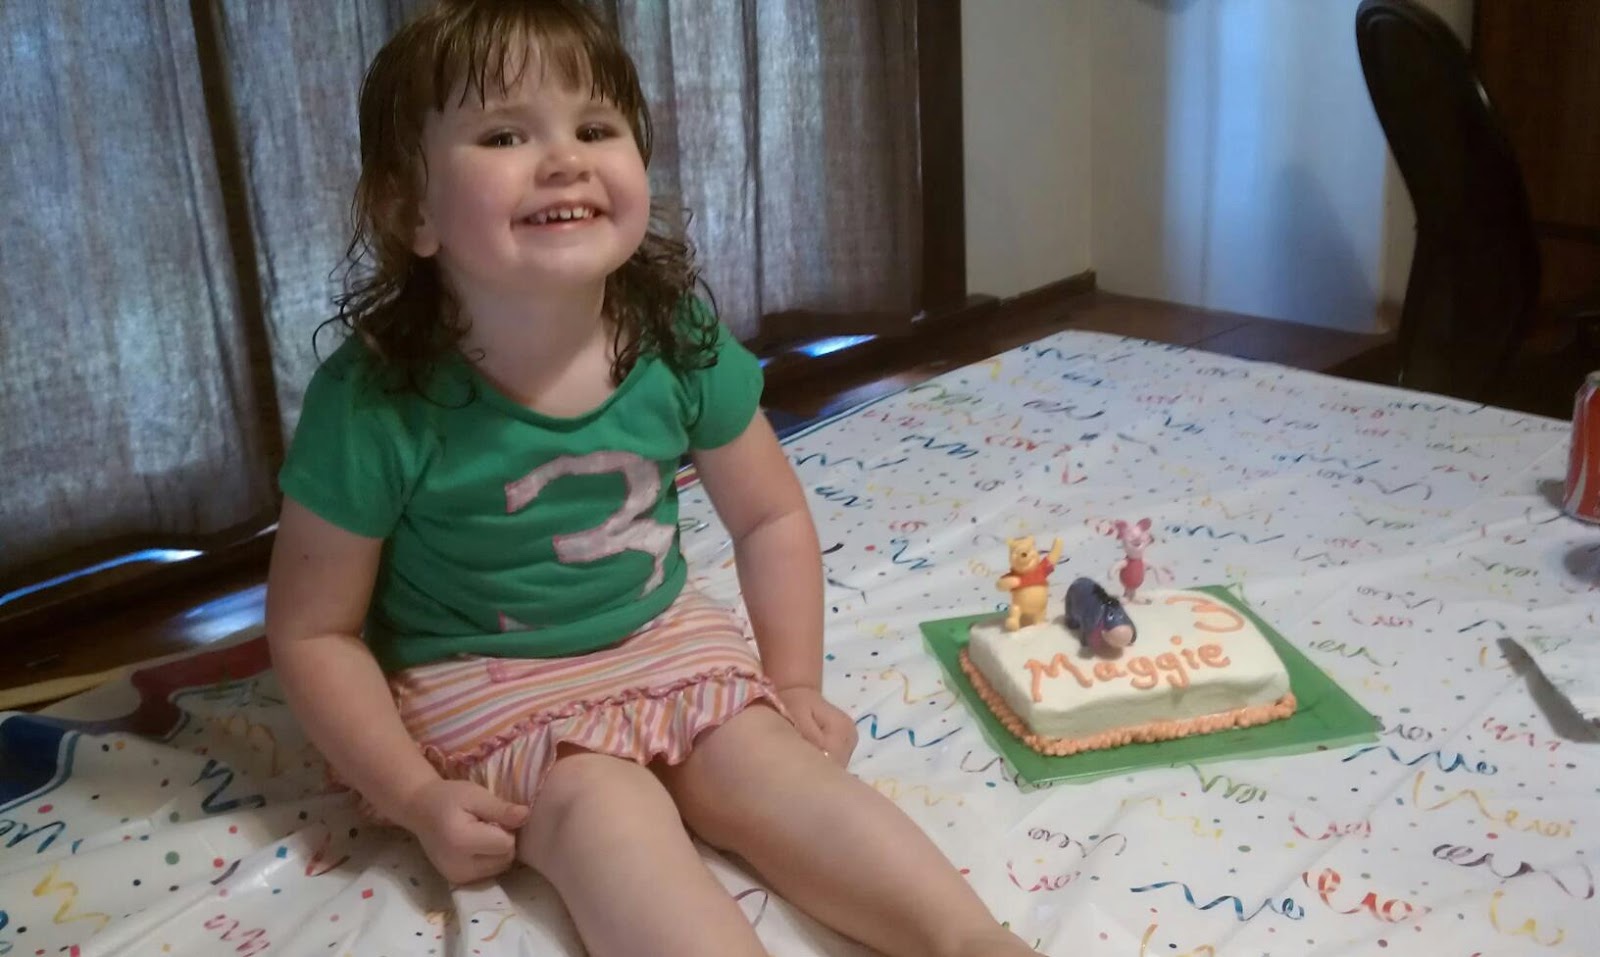
| Poor Maggie Just got a cake with toys stuck in it! She was happy, so that's all that really matters! |
The last couple of years on my daughter Zayda's birthdays I have used a butter cream transfer technique. I have found this technique to be very fast and easy. It hasn't produced the most perfect images for me, but my kids don't seem to care about perfection, so it worked for us.
Last year was Rapunzel from the movie Tangled
This year was a ballerina
I took a coloring page that I had printed from a free online web site ( http://www.coloring.ws/coloring.html is a good place).
I laid the page on a flat cookie sheet and then covered it with clear cling wrap (seran wrap).
I piped the image onto the cling wrap, starting with the black outlines first and then filling in the other colors. I placed the whole cookie sheet in the freezer for at least a few hours.
I went ahead and made a regular cake and iced it flat. After the image was good and frozen, I took it out of the freezer and flipped in onto the cake and peeled off the cling wrap.
This would probably work a lot better with a simple image and not a human face, but leave it to my children to ask for something difficult.
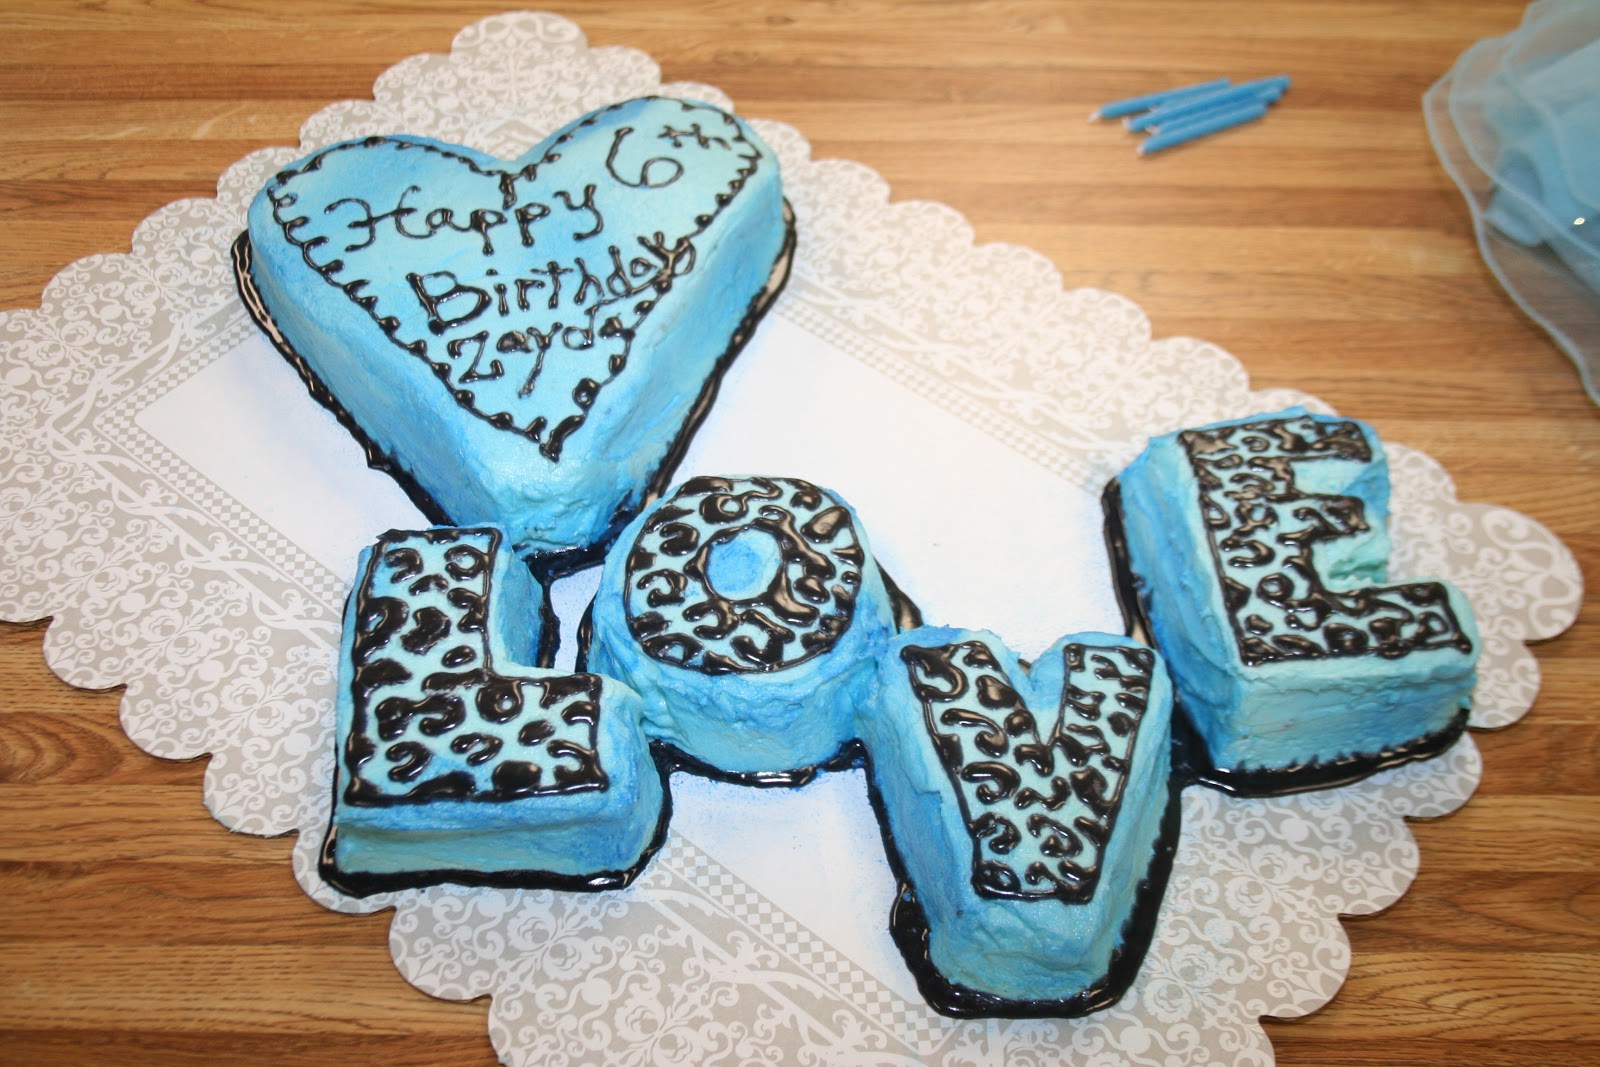
A few years ago, Zayda had what I thought was a pretty strange request, but it turned out cute
I just started with a couple regular 13x9 cakes, cut them into letters, and iced them with buttercream icing.
It wasn't fabulous, but it was a big hit with my little diva!!I like to make a cake just for the birthday girl (or boy) and cupcakes for everyone else. Having a cake all to themselves makes the day even more special.
Just a note: wilton spray icing color is great if you are going for nice looks, but in my daughter's opinion ( and the opinion of most of my Girl Scout Troop), it tastes terrible (very chemical taste). So if you chose to use it, don't use to much if someone is going to be judging the taste of your creation!
Subscribe to:
Posts (Atom)