Thursday, February 8, 2024

 10 years...10 years since I last wrote a blog post.

So much has changed in life. I'm no longer a homeschool mom, I'm no longer a Girl Scout Leader, I'm no longer a foster parent. After spending 5 years as a library director, I am no longer working.

What am I doing?  Well, that's what I'm trying to figure out. 2023 was a strange year for my family. Life is a whirlwind sometimes and you never know when you might get the rug pulled out from under you.

What I do know, is that I will never stop creating fun artistic crafts, I will always love making things for my friends and family, and I promise I will work harder to share my creations!

Just to get everyone up to date:

I have 6 children now. 5 girls and one boy ranging in ages from 28 to 8, one Son-in-law and a brand new Granddaughter. My husband and I have been married for almost 20 years and I still find him amazing. 💘

My current interests. 

*crochet

*knit

*Reading

*macrame

*painting

*paper crafting

*silk flower arrangements

*thrift shopping

*cat snuggling

*Golden Girl watching

*wine and coffee drinking


Monday, February 24, 2014

Knitted baby socks

I FINALLY knitted a pair of socks. I have been knitting for over 5 years now and I have tried knitting socks several times. Every time I have had so much trouble and eventually I have given up. I think I was originally trying a toe up pattern. This time I tried this top down pattern: http://blog.fuzzymitten.com/2009/01/baby-mitten-socks.html

It was so easy and I finished both socks in a couple days (I could have done them much faster, but was crazy busy with chairing a Girl Scout event).
The lucky recepient of these adorable little socks will be my brand new niece. I started knitting them the day before she was born (my sister did not want to know the gender before the birth). BOY am I glad she was a little GIRL.
I use the term, LITTLE, quite loosely since she was actually 9 lbs. 6 oz. Good thing I used a very stretchy sock yarn. I used Patons stretch socks in the color "sugar". I can't wait to go visit the little princess and see if they fit.

Tuesday, February 4, 2014

How I decorated a baby Pirate Room for under $40

My husband and I have recently gone through the process to become foster parents. Long story short, we would love to adopt a son (we have 4 girls) and at this point in time, foster to adopt seems like the best option for us. It has been a long emotional battle so far and we are only just beginning.
So, I decided to fix up our daughter's old bedroom for a boy. One of our girls, (Zayda) has always had a DEEP love for mermaids, so I painted a mermaid on her wall a few years ago. When it came time to redecorate the room, neither Zayda nor I wanted to paint over the mermaid (even though she wasn't ever that great, she's always been kind of a manly mermaid).

After much thought and a lot of Googleing for ideas, I decided to go with a pirate theme. I figured this way, we could keep the mermaid. (mermaids go along with pirates, right???)

The ceiling needed some work. Before we purchased our house and put a new roof on it, there had been some water damage on the ceiling due to the old leaky roof. The plaster had a few cracks and there were spots. Rather than fix this problem (like normal people), I decided to paint the ceiling like a treasure map and let the spots and cracks look like they were intentional. I used mostly folk art and apple barrel craft paint that I already had. You can find this stuff at your local walmart or craft store, it's less than $1 per bottle, I love this stuff!!


Excuse the terrible picture. I couldn't get it all in one shot, so I tried to edit it together. (I need some picture editing practice)


For the treasure chest on the ceiling/treasure map, I hot glued sparkly jewels and Mardi gras beads. I also included a coin that my husband brought back with him from a mission trip to Guatemala.

The coin is a bit symbolic for us since we made the final decision to go forth with attempting to adopt after my husband's trip (He had his heart broken by an orphan he fell in love with and wished he could bring her home).
Little orphan girl <3

Next, I painted water with waves around 3/4 of the room up to the mermaid on her rock that was already on the wall. This didn't cost me anything because I already had 1/2 gallon of left over blue paint my sister had given me from a room she had painted for her kids. I try and use as much left overs as possible. If you are working on a project and only need a little bit of paint, ask your friends and family. Everyone usually has left over paint after a remodel or redecorating since they always buy a little more than they need so they don't run out. I have become really good at mixing left over paint colors to achieve the shade I need. (note: make sure you aren't mixing oil based paint and water based paint together)
I also got some left over paint from my awesome Step-Mother. It happen to be almost the exact same shade that was already on the walls (what a huge blessing). This was awesome, because I needed to do some touch ups. When the bedroom was for the girls, not only had I painted the mermaid, but also I painted their names in giant colorful bubble letters.  (Thank goodness the painted covered really well)

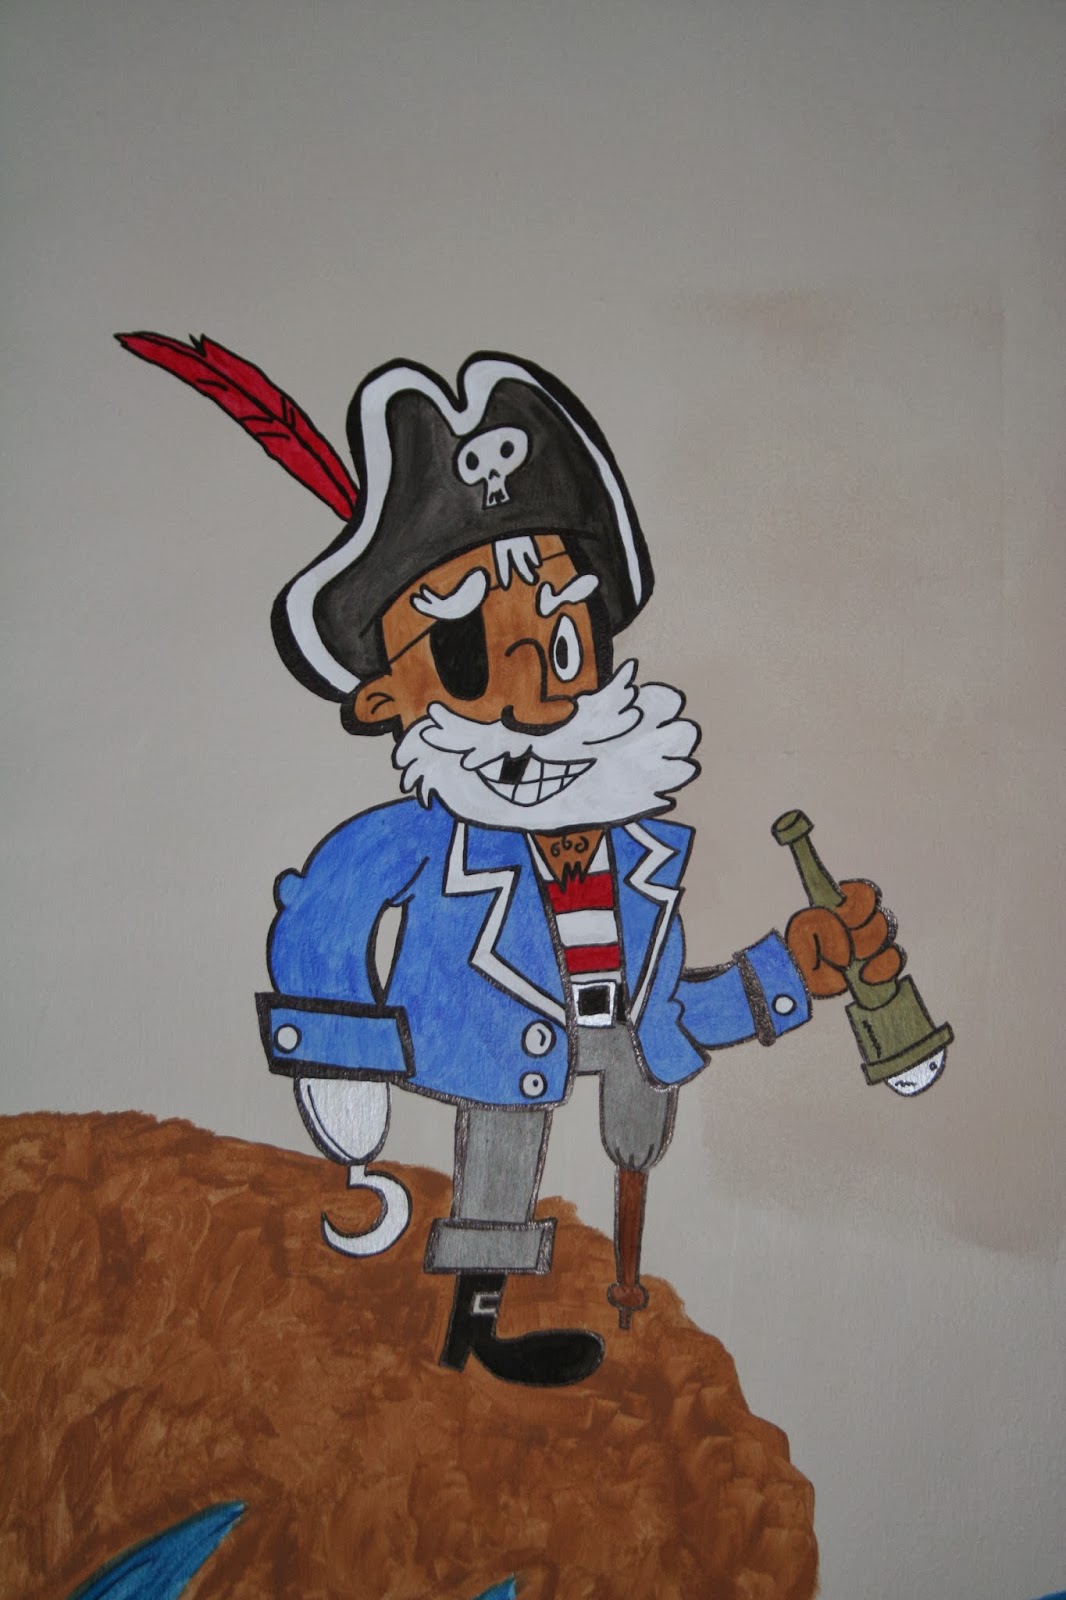
I knew I wanted to paint an actual pirate somewhere in the room, but I wasn't very confident in my own skills to just slap one up (after all I am the one who painted the mermaid drag queen).  So, I Googled free printable pirate coloring pictures. I found this guy http://www.grandparents.com/grandkids/coloring-pages/mr-pirate and decided to project him onto the wall and then paint him.
If you happen to have transparencies, you can print directly onto them and you are ready to go. I didn't have any (and you know me, I'm too cheap to buy any). I printed on regular paper and then traced the image onto a clear page protector with a sharpie. Bam, I was ready to project my pirate. I think he turned out pretty cute.

The last wall of the bedroom, I decided to paint with large red and white stripes. This sounded very pirate-like to me (maybe I'm crazy). This is where most of my money came in since I had to actually go and purchase this paint. I had enough painters tape to make three lines on the wall before I ran out. Pooh! I was too anxious to finish so I had to improvise. I tied some blocks to the end of a long piece of yarn and made my own plum bob. I have no idea if that is the actual word for such a contraption. I would tell you all about how this great idea worked, but it would take awhile ( I will save that for another post). Also on this wall, and all the way around the room, there is a skinny decorative trim. This trim is around most of the walls in our house and when we moved in was painted the same color as the walls. I chose to paint the trim in this room black. I think with a contrasting color that high up, it helps to make the room look bigger, because it draws your eyes upward to the ceiling.

After all that painting, my arm muscles were not very happy with me, So my Mom came over and finished the last corner. She is such a happy painter. I think if her hair were a little bit puffier, people would mistake her for Bob Ross. She does an awesome job!

Since the walls were all finished, I needed to tackle the window coverings. The room originally had pull down shades. I am not usually a fan of pull down shades, but since this is a baby's room, I went with it. I knew mini blinds are not baby friendly and I needed something to block the sun from streaming into the baby's face while it was sleeping during the day (because we all know babies don't actually sleep at night). My only problem with one blind was that it had a hole in it. Sooo, instead of buying a new one, I fixed it with a little duct tape.

For the tops of the windows, I cut triangles from some old double knit material from what I still have left of my Grandmother's stash. I used some white cotton yarn and sewed them together and wrapped them around the existing hooks from previous curtains.

When Zayda was a baby we purchased a rocking/glider and footstool. They were a pale green color, which seemed like a good idea at the time of purchase. A couple toddlers with chocolate cookies later and the chair looked like trash. I tried washing and scrubbing, but it was to far gone. I kept it forever thinking that I would have it recovered. I had some black material left over (again from one of my Grandmothers). I made simple slip covers by laying the pieces down, cutting around them , leaving a little extra for seam allowances.


Since I am a hoarder and nostalgic for strange things, I kept this (and several more) really ugly pillow that my grandmother had made for her couch (probably some time in the 70's).

I felt like the plain black chair needed a little color, but heart pillows in a boy's room seemed a little cheesy. Heart pillows in ANY room seem a little cheesy. So I recovered it with a skull and cross bones. I'm not usually the skeleton type, but a pirate bedroom kind of calls for it. I used a free printed coloring page again and  iron on wonderunder. If don't know about the greatness of Wonderunder, you should google it, it is one seriously awesome invention.


I also recovered a triangle pillow with the same material that I used to make the window covers.

Please ignore the cat hair!

The last little pirate part of the room was the baby mobile. I purchased a mobile from a second hand store for $2. It was cute, but didn't match the theme. I took it apart and made my own pirate pieces instead. 

I just cut pieces of felt and sewed them together with some beads and sequins. I completely fell in love with felt work after this project. There will be more felt work projects in my future for sure!


I guess we are all ready for a baby now. As ready as we will ever be.  We are very anxiously awaiting the call from a social working saying that she has a baby who needs us just as much as we need him. 
So for now, I pray that God gives us this chance.


Monday, December 9, 2013

Barbie's Crocheted basket


My best friend requested that I crochet her a lavender basket for her daughter's Barbie stuff.  If Barbie lives in your home, then you understand what a load of crap she has. I came up with this (which, by the way, can be used for anything, not just Barbie). I am considering making myself one to control the various craft projects that end up in the floor beside my bed.
I started by having my husband cut me a board into a circle with holes drilled around it. He used a 1 inch wood of some type(I have no idea what it was). It was a little funny looking (He makes a much better nurse, than he does a carpenter).
I painted the bottom white and the top purple with cheap apple barrel craft paints. (I love that stuff.)


I cut strips of fabric (approximately one inch) from an old sheet. I threaded them on a yarn needle and whip stitched them threw the drilled holes all the way around the board.


Next, I used a large size N crochet hook and double crocheted all the way around into the stitches I had just made. (this part was not easy, make sure you don't make your stitches to tight or else you can't get your hook under them. Some of mine were to tight so I had to slide the material under with the yarn needle.) I continued to crochet in the round until I had my desired height. 
I added a row of fluffy purple yarn to the top row with just a single crochet around.


This made for a very heavy sturdy basket. Next time I think I will try and use a heavy cardboard base, or perhaps a thinner wood.


Thursday, December 5, 2013

Knitting a Camel to save my soul

Will learning to knit a camel save your eternal soul? No...no it will not, but don't let that stop you.

I was raised Methodist. I grew up right next door to the church, and my Mother was very involved in the goings on of the daily church activities, especially the youth.  For whatever reason, I was never baptized. (I questioned my Mother about this one day and she says, "You weren't??? oh, no I guess you weren't, that was your sister that was baptized there, wasn't it?  Not sure how this slipped her mind??) Once I grew up and moved out of the house, I stopped going to church. There wasn't really a reason, I was just to lazy to get up and go. Over the years, various things happened and my Mother started attending a new church a few blocks away. She loved her church and invited me to come (more than once!). I ,of course, did not go. I grew up, got married and had beautiful baby girls.  When my daughter was about 5 years old, she was playing with my Mother's nativity scene (she has about 40 sets).  She didn't know who any of the people were......This hit me hard. I loved the good Christian upbringing that I had been given and I knew I wanted to pass that on to my girls.
That was several years ago....
If I should die today, I know where I am going.
A few years ago, I decided it was time. I accepted that I was a sinner and that Jesus Christ died to save me from those sins and I was baptized. (It really is that simple) Not long after that, My husband and my Step-daughter were both baptized on the same day.  This past year, I got to watch as my husband baptized our now 8 year old daughter.
Just this week, my girls helped my mother get out and arrange her gazillion sets of the nativity. I am quite confident that my girls now know, not only who these people are, but why we are celebrating Christmas.
The Christmas after I joined the Church, I decided to knit my Mother a nativity. I managed to finish a Virgin Mary that year. The next year I made a baby Jesus, and last year a Joseph.
Today, I am in the process of knitting a camel.  Knitting a camel won't save my soul. It has already been saved.  But every time I set out to knit a part of my Mother's nativity, it reminds me of  Jesus... of how my family was lost, but now we are found.... of why we celebrate this time of year... of how much stuff I will one day have to clean out of my mother's house.
I may never be finished with the knitted nativity set, just because I love the feeling I get when I design a new piece.
I should have the pattern for this little guy finished this week....or at least before Christmas. I will post it as soon as I am finished.  So maybe someone else out there can knit a nativity and consider what Jesus has done for them.

Monday, November 18, 2013

Finally...Mostly....Good enough for now!

We have finally moved our girls upstairs to their new bedroom. Hurray! I have been waiting for this day for quite some time (with slight misgivings at having my little ones on a separate floor). When I first had the idea for their new bedroom, I sketched it out like I was a professional woodworker/architect. I am neither, but boy do I think I am cool, now that what I sketched has actually come to life!
Here was my sketch, (please don't laugh)


Here was the bedroom before
We had already torn down all the plaster. Apparently I forgot to take a "before we started demo" picture
 a link to my previous post about the room when we startedhttp://eleciascreativei.blogspot.com/2013/06/my-plans.html

Here is the bedroom now (well, not this very moment, because Barbie has moved in and you don't want to see that, she is a total mess)
Her cat assumes the first shelf is a cat bed!

The couldn't agree on what color to paint the new room, so I let them each chose their own side color. The both picked their favorite colors (purple and orange), so they sort of look like big L.A. Lakers fans, but, oh well, they love it!
I even painted the ceiling fan half and half

I always thought having a huge attic was sort of a wasted space, much to my Father's dismay (He owns an Insulation company, so attics are his thing!)
Building their beds into the walls have given my girls a huge amount of play area in the room. Even though we still need to finish some trim around the beds and some in the baseboard area, I moved them in anyway. It was so worth it when two days later, my 8 year old, says, "Mom, thanks for finishing my new room. I love it."
(attempting to discretely wipe tears from my eyes) "You are welcome sweetheart, I am glad you love it" 
So, let this be a lesson. If you have a crafty thought....something that could make your house/life better....go for it. Don't assume that since you aren't a carpenter/plumber/race car driver/president of the United States that you can't do it.  Anyone can do Anything they set their mind to. 

Monday, July 22, 2013

Knit Girl Scout dish cloth

I have been a Girl Scout Leader for several years now.  I have done internet searches before for crochet and knit patterns for Girl Scouts and I never find much. This of course inspired me to create a dishcloth with the Girl Scout logo. My husband didn't realize what it was upon first glance, but if your brain thinks Girl Scout Green like mine does, then I'm sure you recognized it right away!
So here it is, the first knit patterned to be shared on my blog. (the first of many, I hope!

Knit Girl Scout Dish Cloth

I used size 7 or 4.5mm knitting needles (but I knit really tight)
size isn't really an issue in a dish cloth, Mine turned out to be 7 inches x 7 1/2 inches. If you prefer your to be bigger or smaller than that, then just use a bigger or smaller needle sizes.
 I used Sugar 'N Cream cotton yarn in Mod Green, but any cotton yarn would do just fine

Cast on 35 stitches
row 1: Knit across
row 2: Knit across
row 3: Knit across
row 4: Knit across
row 5: K5, P25, K5
row 6: Knit across
row 7: K5, P25, K5
row 8: K15, P4, K16
row 9: K5, P11, K4, P10, K5
row 10: K13, P7, K15
row 11: K5, P10, K7, P8, K5
row 12: K12, P9, K14
row 13: K5, P9, K9, P7, K5
row 14: K11, P10, K14
row 15: K5, P9, K10, P6, K5
row 16: K11, P13, K11
row 17: K5, P6, K13, P6, K5
row 18: K11, P15, K9
row 19: K5, P4, K15, P6, K5
row 20: K8, P2, K2, P15, K8
row 21: K5, P3, K15, P2, K2, P3, K5
row 22: K8, P3, K4, P13, K7
row 23: K5, P2, K13, P4, K3, P3, K5
row 24: K6, P1, K3, P4, K4, P10, K7
row 25: K5, P2, K10, P4, K4, P3, K1, P1, K5
row 26: K6, P3, K3, P5, K4, P7, K7
row 27: K5, P2, K7, P4, K5, P3, K3, P1, K5
row 28: K6, P4, K5, P3, K4, P6, K7
row 29: K5, P2, K6, P4, K3, P5, K4, P1, K5
row 30: K8, P4, K4, P11, K8
row 31: K5, P3, K11, P4, K4, P3, K5
row 32: K10, P4, K3, P9, K9
row 33: K5, P4, K9, P3, K4, P5, K5
row 34: K11, P4, K5, P4, K11
row 35: K5, P6, K4, P5, K4, P6, K5
row 36: K11, P6, K18
row 37: K5, P13, K6, P6, K5
row 38: K12, P8, K15
row 39: K5, P10, K8, P7, K5
row 40: K13, P7, K15
row 41: K5, P10, K7, P8, K5
row 42: K15, P4, K16
row 43: K5, P11, K4, P10, K5
row 44: knit across
row 45: K5, P25, K5
row 46: knit across
row 47: knit across
row 48: knit across
row 49: knit across
row 50: knit across
cast off
weave in loose ends and you are finished!

Saturday, July 20, 2013

Sigma - Sigma - Sigma Rug

I designed this rug as a present for my baby sister. She is no longer a baby, she will be 19 next month (gasp). She is turning into an awesome lady. This fall she starts her second year in college and will be living in a sorority house. Last year she became a proud member of the Sigma Sigma Sigma, or Tri-Sigs as they are called.
So here it is:
I originally thought I would make it all hot pink with purple letters, but I quickly realized that I didn't have enough hot pink material and didn't want to go buy more, so I went with hot pink, light pink, and white.
The entire rug is made up of double crochets. I drew a graph of the sigmas before I started.
It looked like this:
I started at the left side of the graph and worked my way across.  The rug was 36 double crochets across, I started by chaining 38 and double crocheting in 4th chain from the hook. (chain 3 counts as a double crochet. Double crochet across and chain 3 and turn for each row.

 For the first Sigma, I carried some of the colors across, but I realized that didn't look quite as neat as it should. Carrying colors with yarn works out pretty well, but carrying colors with material does not.  So for the next two Sigmas, I changed colors each time. I didn't link all my material into a roll before I started like I usually do, I just worked from a bag of strips, that way I could cut off and link in a new color whenever I needed one, which I realize is a lot of work when you get to the middle and you have to switch after one single stitch, but it looks so much smoother.


 After finishing all 32 rows, my finished rug measured 19 inches across and 27 inches long (not including fringe).
I tied some purple fringe on the ends of mine (per my sister's request), and that really made it adorable.
So since this project worked out so well, I am now wondering what other designs I could crochet into a rug. The possibilities are endless!

Wednesday, July 3, 2013

Watermelon Rag Rug

Watermelon Rag Rug

Sorry for the terrible picture. My husband got a new camera to take on a mission trip to guatemala, so I thought I would use it. I now know that my phone takes better pictures than that crappy little thing.

While my husband was in Guatemala, setting up and working in a free medical clinic for a week, I took our little girls and went to visit my sister in southern Indiana.  My sister and her husband have 9 beautiful, healthy, happy children (and one on the way).  That is pretty unheard of these days, but it works for them, and we love spending time there.
I have been working on a lot of rag rugs lately, mainly because my mother keeps giving me bags of fabric that she has already cut into strips for me.  She made A TON of little pillow case dresses to send with the group going to Guatemala, and so all of the scraps of fabric she had left over she would send my way.
While in Indiana, I found inspiration everywhere. I came home with so many ideas. The following pattern is the first one I finished.

NOTE: when working with rag strips, sometimes you will need to add or decrease a stitch or two here and there to get your rug to lay flat properly. It all depends on how wide you cut your fabric and what type of fabric you are using. also it may depend on how tight or loose you crochet.

Watermelon Rag Rug

Hook size N/10mm

dc = double crochet
rnd = round
ch = chain
st = stitch
I wrote this pattern in rounds, but since it is only a half circle rug, you will be turning, each (round) as I have referred to them is actually just a half round or row.

with bright pink fabric
chain 4, join with a slip stitch to form a ring
round 1: chain 3, 7 double crochets in the ring
rnd 2: chain 3, turn, (working in front loops only) 2 double crochets in each space (your chain 3 will count as your first double crochet)
rnd 3: chain 3, turn, (working in back loops only) , dc in first st, 2 dc in the next st, 1 dc in next st,
with black fabric 2 dc in next st
with pink 1 dc in st, 2 dc in st, 1 dc in st
with black fabric 2 dc in next st
with pink 1 dc in st, 2 dc in st, 1 dc in st
with black 2 dc in next st
with pink, 1 dc in st, 2 dc in st, 1 dc in st, 1 dc in st
rnd 4: with pink, ch 3, turn, (working in front loops only) *dc in each of first 3 stitches, 2 dc in next st*, repeat from * around
rnd 5: with pink, ch 3, turn (working in back loops only) 1 dc in each of next 3 st
with black 2 dc in next st
with pink 1 dc in each of next 4 st, 2 dc in next st,
with black 1 dc in each of next 2 st
with pink 1 dc in each of next 2 st, 2 dc in next st
with black 1 dc in each of next 2 st
with pink 1 dc in each of next 2 st, 2 dc in next st, 1 dc in each of next 2 st
with black 1 dc in each of next 2 st
with pink 2 dc in each of last 2 spaces
rnd 6: with pink, chain 3, turn (working in front loops only) dc in each st around
rnd 7: with pink, chain 3, turn (working in back loops only) 1 dc in each of next 6 st, 2 dc in next st, 1 dc in next st
with black 1 dc in each of next 2 st
with pink 1 dc in each of next 2 st, 2 dc in next st, 1 dc in each of next 2 st,
with black 1 dc in each of next 2 st
with pink 1 dc in next st, 2 dc in next st, 1 dc in each of next 4 st,
with black 1dc in each of next 2 st
with pink 1dc in same st as last black dc, 1 dc in each of next 5 st, 2 dc in next st, 1 dc in each of last 2 st
rnd 8: with pink chain 3, turn (working in front loops only)
dc in first 7 st, 2 dc in next st, *dc in each of next 6 st, 2 dc in next st* repeat from the * around
rnd 9: with pink chain 3, turn (working in back loops only)
*1 dc in each of 7 st, 2 dc in next st* repeat from * around
rnd 10:with pink chain 3, turn, (working in front loops only)
*1 dc in each of 8 st, 2 dc in next st* repeat from * around
rnd 11: with a lighter shade of pink, ch 3, turn, (working in back loops only)
*1 dc in each of 5 st, 2 dc in next st* repeat from * around
rnd 12: with ligher pink, ch 3, turn (working in front loops only)
* 1dc in each of 6 st, 2 dc in next st * repeat from the * around
rnd 13: with a light green, chain 3, turn (working in back loops only)
*1 dc in each of 7 st, 2 dc in next st* repeat from the * around
rnd 14: with a darker green, ch 3, turn (working in front loops only)
*1 dc in each of 8 st, 2 dc in next st* repeat from the * around
rnd 15: with dark green, ch 3, turn, (working in back loops only)
*1 dc in each of 9 st, 2 dc in next st* repeat from the * around

weave in any loose fabric strips and you are finished!

Thursday, June 20, 2013

My plans!

When we first moved into our house 4 1/2 years ago, Our youngest daughter was about 4 or 5 weeks old. We decided that we would store anything that wasn't necessary to daily life in a bedroom upstairs that we weren't using, until I was able to organized and arrange stuff. We knew that we would remodel the room for our daughter, someday.
Last summer we decided that someday was now. We are still not finished. Probably if we were a normal family who just wanted the old paneling (this room was once a gun display room) and plaster removed and new drywall up, we would be finished by now, but that isn't my style.
We decided that our two younger girls would be sharing the bedroom, so in order to make more space, I decided to have the beds framed into the walls.
I drew up plans and everything. I have been drawing plans for houses since I was a child, mostly they included rooms for my pool and in-house McDonalds. I would proceed to give these plans to my father and tell him that when I was old enough he had to build them for me.  So that fact that the plans for this room are actually being carried out is quite a MAJOR accomplishment for me.
The room is still a far cry from being finished. We have only been working on it in our spare time, which is almost never, but I am already so excited to share it with you.


You are probably thinking wow, what a mess, but just wait till you see the finished product. I hope it comes sooner than later!!!!

Wednesday, June 19, 2013

D's Sunflower Rag Rug

    Twice a month a group of awesome ladies gather at my local Library to crochet, knit, exchange patterns, and most importantly....share stories. I consider this time to be my free therapy.  I love these ladies! We are from all different ages and walks of life, but we all love to create things with yarn.
    Last time we met, I had no choice but to take my little girls with me. Don't get me wrong here, I love my girls and I love my time with them, but Mommy needs her break time!!!
   Usually to begin these very informal meetings, everyone shows off what they have been working on. My friend Delyn had been making Minion hats (based on the movie despicable me.) My girls love that movie, and so Zayda immediately put on a hat and claimed it as her own. Being the generous friend that she is, Delyn insisted that she could have it and wouldn't give me a real answer about how much money she intended to sell them for.  So at about 11:30 PM, while I was laying in bed not sleeping because my brain doesn't want to quit for the night, I decided to make something for Delyn in return. I remembered that she loves sunflowers, and since I have been making so many rag rugs lately, Boom....and Idea.....So here it is!

Sunflower Rag Rug Pattern

I used a  crochet hook size N 15/10mm

If you haven't worked with rags to crochet before, see my post about preparing them HERE!


with brown rags, chain 4, slip stitch in 1st chain you made to form a ring.

round 1: chain 3, make 11 double crochets into ring, slip stitch in top of chain 3 to join.
round 2: Chain 3, make 2 double crochets in each space around, working in back loop only, slip stitch in top of chain 3 to join
round3: chain 3, * double crochet in first space, 2 double crochets in next space (all only in back loops)*, repeat from the * all the way around, slip stitch in top chain to join.
round 4: chain 3, *double crochet in first space, double crochet in next space, 2 double crochets in next space (all in back loops only)*, repeat from the * around, slip stitch in top chain to join.
round 5: Switch to yellow rags
chain 3, * one double crochet in each of first three spaces, two double crochets in next space (all in back loop only)* , repeat from * around, slip stitch in top chain to join.
round 6: chain 6, single crochet in first space, * chain 6, skip a space, single crochet in next space*, repeat from * around,  join with a slip stitch to 1st chain.
round 7: slip stitch your way to the top of the 1st chain 6 space, *chain 2, single crochet in the next chain 6 spot* , repeat from the * around, join with slip stitch.
round 8: chain 3, *2 double crochets in chain 2 space, 2 double crochets in single crochet space, 2 double crochets in chain 2 space, 1 double crochet in single crochet space* repeat from the * around, slip stitch to join
round 9: chain 6, single crochet in 1st space, *chain 6, skip a space and single crochet in next space*, repeat from the * around, slip stitch to join.
round 10: slip stitch your way to the top of the chain 6 space, * chain 2, single crochet in the next chain 6 space*, repeat from the * around, slip stitch to join.
round 11: *chain 4, single crochet in the single crochet space*, repeat from the * around, slip stitch to join.
weave in loose ends and you're done!
My finished rug measured about 22 inches across, if you want a bigger rug, just add more rounds.
Kitty approved!

Thursday, June 6, 2013

Am I doing things the WRITE way?

We homeschool.......
Whenever we speak this line to anyone, it always starts a conversation. Some people are strongly against it and some people give us praise and ask questions about how they can go about doing it themselves.  We have a million and one reasons why we homeschool our little girls instead of sending them to the public school (which by the way is a great school), but I won't get into that just now.
I am always very critical of myself. Homeschooling can bring this out full force. I don't always have the best grammar  and I wasn't ever a straight A student myself. So how do I have the skills to teach my children?
This is a question that I ask myself quite a bit. I still don't have the answer. I hope and pray that God guides me in the right direction, but how do I know?
It is the little things that tell me, for example:
My Eight year old loves the Disney movie Brave and one day she came up with this contraption all on her own.

In case you haven't seen the movie, the main character (Merida) is an amazing archer. My daughter really wants a bow and arrow, but for the time being she is happy to use her home made one.

It is made from a foam sword (which was already starting to break and duct taped back together), the elastic waist band from her father's boxer shorts, and the arrow is a half a pool noodle.  Believe it or not, it actually shoots pretty well.

Yesterday, my little sister came to visit and my eight year old shared a book with her that she had been writing. I was unaware of this book. She likes to be very secretive about things she is writing or drawing until they are completely finished, but she frequently shares her secrets with her aunt because they are very close at heart!  My sister came to me and said," have you read this book? It is really impressive, several chapters done already, a title and everything!" I was pretty excited, but I kept it to myself. I can't wait until she brings me the finished product.

I will probably always question myself about whether or not I am doing a good job with educating my children. I guess I won't know for sure until they are adults, but until then, I am satisfied by their little sparks of creativity.